Annnd Hello!
This is Kinani again, back with a series of blog posts which will be posted across the upcoming months.
Today I’ll be working on a very interesting side project of mine, actually it’s not really side project. the truth is, that I’m learning how to handle new toys in order to integrate them with my senior Graduation Project, and the best way to learn something is by teaching it to YOU… THE PEOPLE. so let’s begin.
Basically we’re going to store Raspberry Pi’s sensor readings in a relatively new database type from Microsoft called DocumentDB, DocumentDB is a NoSQL database which means there’s no relationships involved between collections, In DocumentDB there’s no tables it’s called ‘Collections’. and collections can store Documents, so in a relational DBs documents are the ‘fields’ in the tables. not just storing we’ll also project the data through an MVC application hosted on Azure.
Why DocumentDB?
- Elastically scalable (It’s just a JSON Database)
- Queries with familiar SQL syntax, and yes you can use LINQ.
- Low latency (less than 10 ms latencies on reads and less than 15 ms latencies on writes) making it a prefect match for IoT solutions!
- Embedded JavaScript engine, so yeah you can execute JS code right away within the DB.
Prerequisites
- Azure subscription, don’t have one? MS got you covered MS Dev Essentials Program offers $25 monthly as credit for free(Will cover the App service part but not DocumentDB, for it you will have to activate the free 30-days free trial.
- A Raspberry Pi 2 Model B+.
- A Raspbian operating system running on the Raspberry.
- Visual Studio 2015 Community Edition.
- Azure SDK for .NET version 2.5.1 or higher.
- A sensor (Here I used Ultra sonic HC-SR04 module, and I’ll be continuing this blog post with the assumption of you being aware of how to wire up the module with the Raspberry Pi)
Creating DocumentDB account
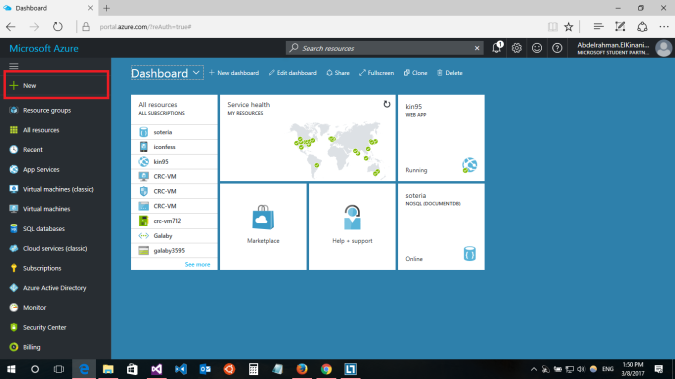
From the Azure portal side bar button click New
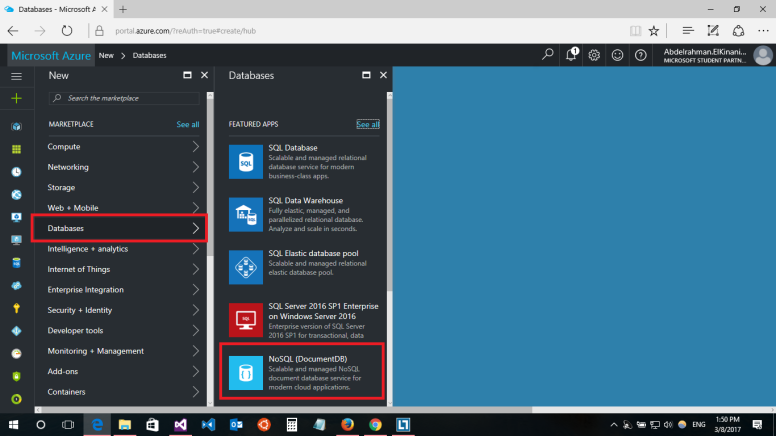
Then Databases > NoSQL(DocumentDB)
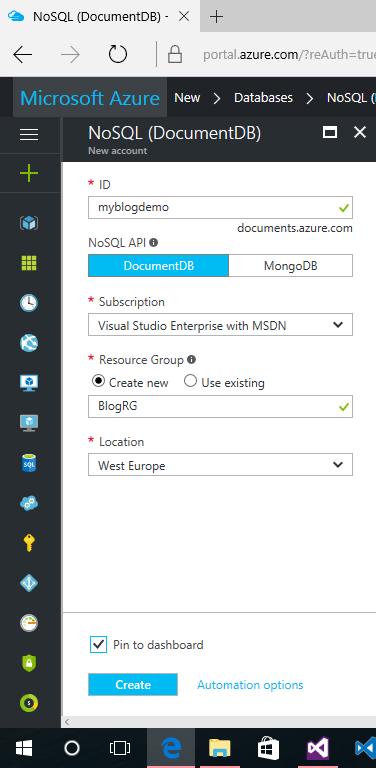
Fill in the ID for your DocumentDB account, create new Resource Group if needed, and chose the closest location of the data center to you(for better latency)
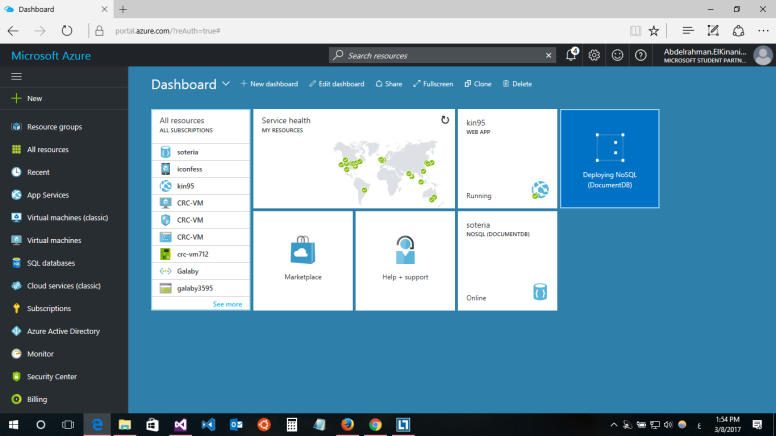
Then wait until the deployment completes, and we’re ready to go.
Click on it
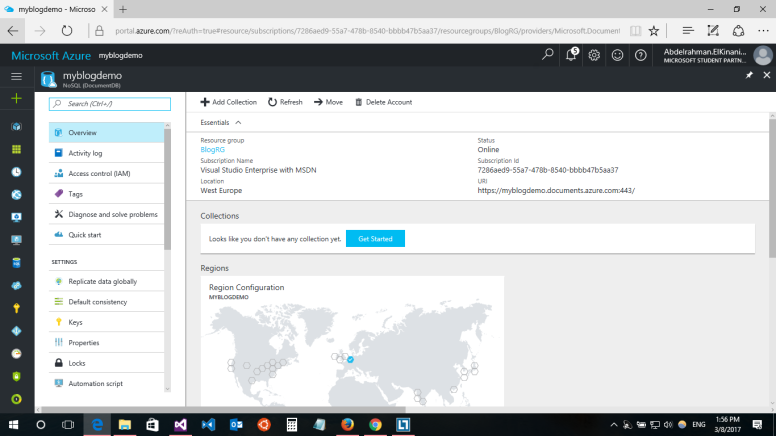
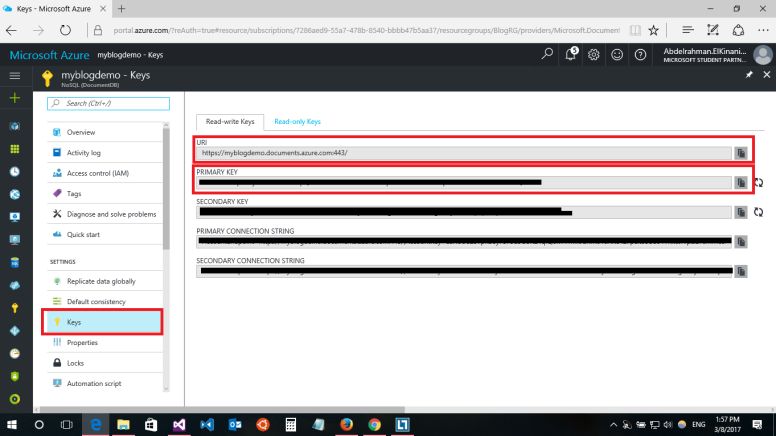
Then from Keys, we need the following. copy them for later use:
- Endpoint URL
- Primary/Secondary Key (either of them will work)
Moving on to Visual Studio 2015, Here we’ll start working on the MVC project.
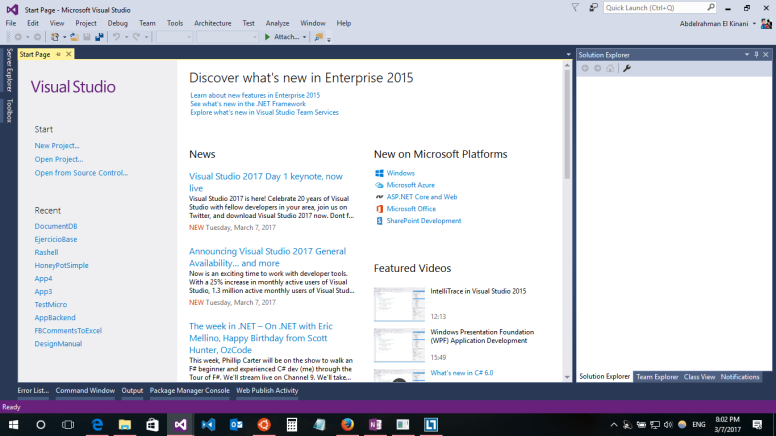
On your keyboard press Ctrl+Shift+N, to create new project, templates -> Visual C# -> Web -> ASP.NET Web Application(.NET framework)
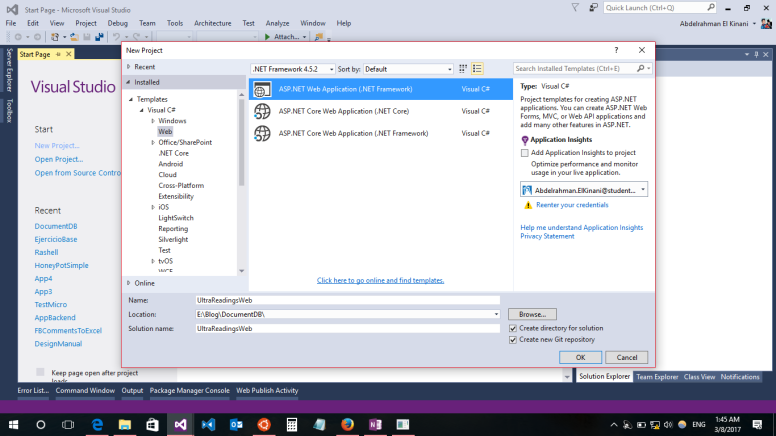
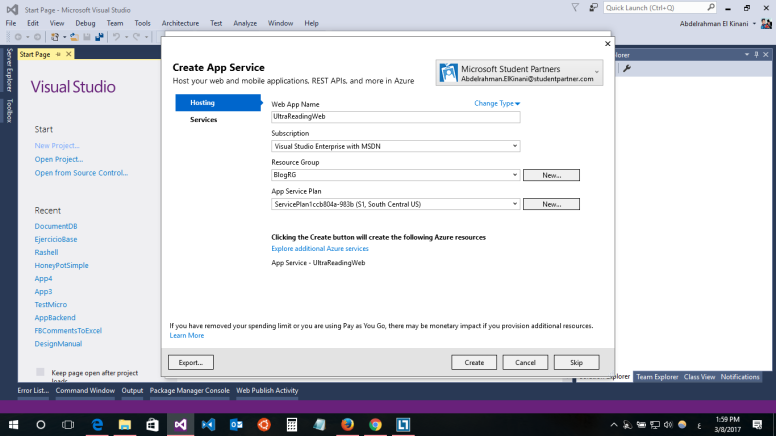
Click Ok, and then chose the MVC Template, check Host in the cloud, like the following.

Click OK, and new window will appear to enter your new Azure Web App data.
We’ll now start to add DocumentDB .NET SDK to our project and you can do that by using NuGeT Package Manager Console.
From Tools -> NuGeT Package Manager -> Package Manager Console
And type the following in the Console:
Install-Package Microsoft.Azure.DocumentDBAccept the License window when it appears.
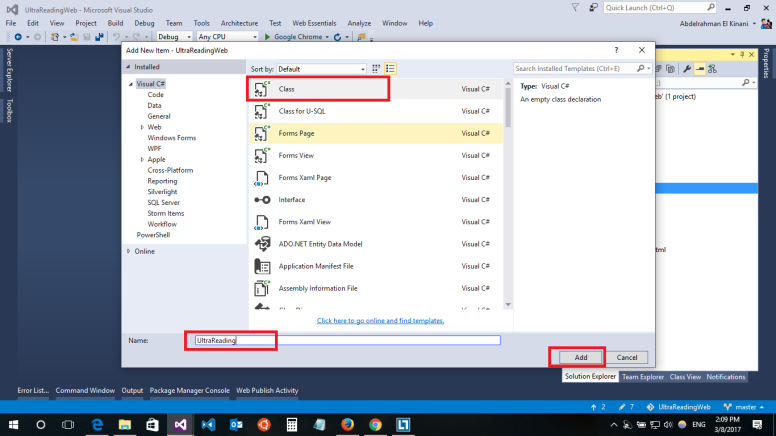
The next step is to add the Model that will represent our data, In Solution Exlorer, right-click the Models folder, click Add, and then click Class.
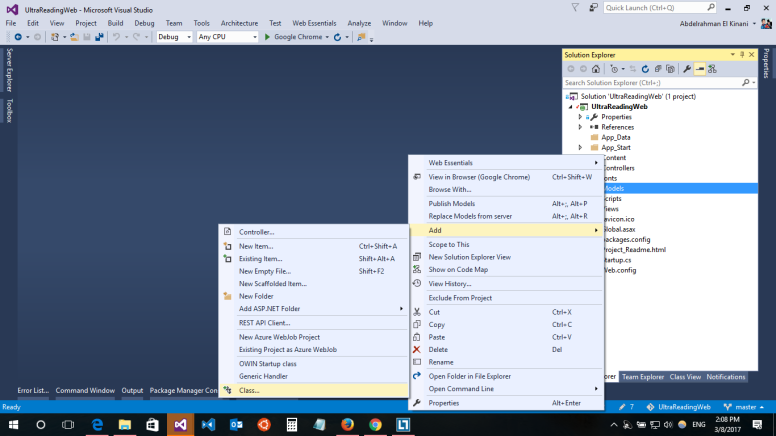
Enter the name and then click Add
Change the the class code to following
| using System; | |
| using System.Collections.Generic; | |
| using System.Linq; | |
| using System.Web; | |
| using Newtonsoft.Json; | |
| namespace UltraReadingWeb.Models | |
| { | |
| public class UltraReading | |
| { | |
| [JsonProperty(PropertyName = "id")] | |
| public string Id { get; set; } | |
| [JsonProperty(PropertyName = "reading")] | |
| public string Reading { get; set; } | |
| } | |
| } |
This model is made up of two properties:
- Id
- Reading (reading is the actual reading of the sensor)
We have the JsonProperty attribute over each of them for serialization/deserialization, recalling that DocumentDB is just a big JSON container.
We now add the Controller of our MVC, In Solution Explorer, right-click the Controllers folder, click Add, and then click Controller
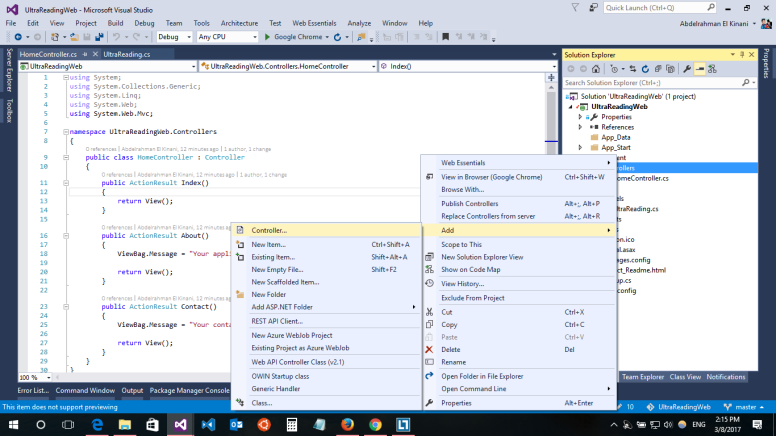
Then Add Scaffold dialog appears, select the MVC Controller – Empty, then click Add.
Naming controllers in MVC follows the Model, so in our case we named the Model “UltraReading” so our Controller will be named “UltraReadingController”
Before adding the code to our controller, we need to write the code of the DocumentDB driver; as we’ll be using it within the Controller.
Within Solution Explorer, Add new folder named Common
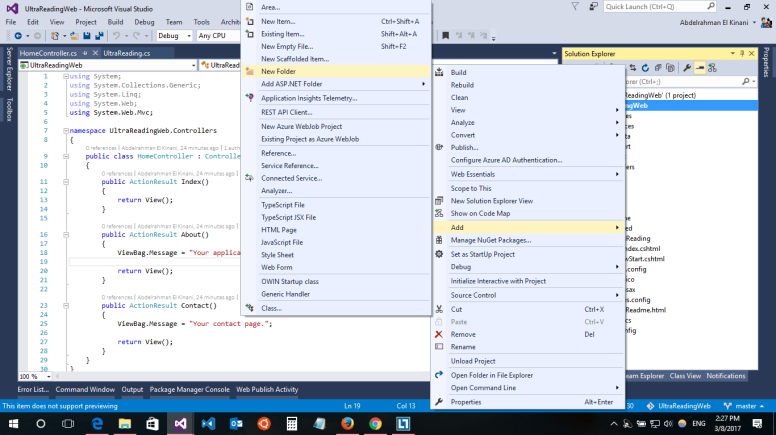
Add to the Common folder new class and name it “DocDBRepo”
Change the code to the following:
| using System; | |
| using System.Collections.Generic; | |
| using System.Linq; | |
| using System.Web; | |
| using Microsoft.Azure.Documents; | |
| using Microsoft.Azure.Documents.Client; | |
| using Microsoft.Azure.Documents.Linq; | |
| using System.Configuration; | |
| using System.Linq.Expressions; | |
| using System.Threading.Tasks; | |
| using UltraReadingWeb.Common; | |
| namespace UltraReadingWeb.Common | |
| { | |
| public static class DocDBRepo<T> where T : class | |
| { | |
| private static DocumentClient client; | |
| public static void Initialize() | |
| { | |
| client = new DocumentClient(new Uri(Constants.EndPoint) | |
| , Constants.AuthKey); | |
| CreateDatabaseIfNotExistsAsync().Wait(); | |
| CreateCollectionIfNotExistsAsync().Wait(); | |
| } | |
| private static async Task CreateDatabaseIfNotExistsAsync() | |
| { | |
| try | |
| { | |
| await client.ReadDatabaseAsync(UriFactory.CreateDatabaseUri(Constants.DatabaseId)); | |
| } | |
| catch (DocumentClientException e) | |
| { | |
| if (e.StatusCode == System.Net.HttpStatusCode.NotFound) | |
| { | |
| await client.CreateDatabaseAsync(new Database { Id = Constants.DatabaseId }); | |
| } | |
| else | |
| { | |
| throw; | |
| } | |
| } | |
| } | |
| private static async Task CreateCollectionIfNotExistsAsync() | |
| { | |
| try | |
| { | |
| await client.ReadDocumentCollectionAsync(UriFactory.CreateDocumentCollectionUri(Constants.DatabaseId, Constants.CollectionId)); | |
| } | |
| catch (DocumentClientException e) | |
| { | |
| if (e.StatusCode == System.Net.HttpStatusCode.NotFound) | |
| { | |
| await client.CreateDocumentCollectionAsync( | |
| UriFactory.CreateDatabaseUri(Constants.DatabaseId), | |
| new DocumentCollection { Id = Constants.CollectionId }, | |
| new RequestOptions { OfferThroughput = 1000 }); | |
| } | |
| else | |
| { | |
| throw; | |
| } | |
| } | |
| } | |
| public static async Task<IEnumerable<T>> GetItemsAsync(Expression<Func<T, bool>> predicate) | |
| { | |
| IDocumentQuery<T> query = client.CreateDocumentQuery<T>( | |
| UriFactory.CreateDocumentCollectionUri(Constants.DatabaseId, Constants.CollectionId)) | |
| .Where(predicate) | |
| .AsDocumentQuery(); | |
| List<T> results = new List<T>(); | |
| while (query.HasMoreResults) | |
| { | |
| results.AddRange(await query.ExecuteNextAsync<T>()); | |
| } | |
| return results; | |
| } | |
| } | |
| } |
Coming to back to the Controller, we now can write it’s logic
| using System; | |
| using System.Collections.Generic; | |
| using System.Linq; | |
| using System.Web; | |
| using System.Web.Mvc; | |
| using System.Net; | |
| using System.Threading.Tasks; | |
| using UltraReadingWeb.Models; | |
| using UltraReadingWeb.Common; | |
| namespace UltraReadingWeb.Controllers | |
| { | |
| public class UltraReadingController : Controller | |
| { | |
| [ActionName("Index")] | |
| public async Task<ActionResult> IndexAsync() | |
| { | |
| var items = await DocDBRepo<UltraReading>.GetItemsAsync(r => r.Reading != string.Empty); | |
| // Important: Not the best optimized way to do it, acutally it's very harmful to the user exprience. | |
| // You may want to explore another option. | |
| return View(items.Reverse().Take(15)); | |
| } | |
| } | |
| } |
What we did here is just querying all the Readings that’s not empty, reversing the results, taking the first 15.
Now, we move on to the last piece in MVC, and that’s the View.
In Solution Explorer, expand the Views folder, right-click the empty UltraReading folder that Visual Studio created for you when you added the UltraReadingController earlier, click Add, and then click View.
In the Add View dialog box, do the following:
- In the View name box, type Index.
- In the Template box, select List.
- In the Model class box, select UltraReading (UltraReadingWeb.Models).
- Leave the Data context class box empty.
- In the layout page box, type ~/Views/Shared/_Layout.cshtml.
Then click Add.
We edit that View code into the following
| @model IEnumerable<UltraReadingWeb.Models.UltraReading> | |
| @{ | |
| ViewBag.Title = "Index"; | |
| Layout = "~/Views/Shared/_Layout.cshtml"; | |
| } | |
| <h2>Index</h2> | |
| <table class="table"> | |
| <tr> | |
| <th> | |
| @Html.DisplayNameFor(model => model.Reading) | |
| </th> | |
| <th></th> | |
| </tr> | |
| @foreach (var item in Model) { | |
| <tr> | |
| <td> | |
| @Html.DisplayFor(modelItem => item.Reading) | |
| </td> | |
| </tr> | |
| } | |
| </table> |
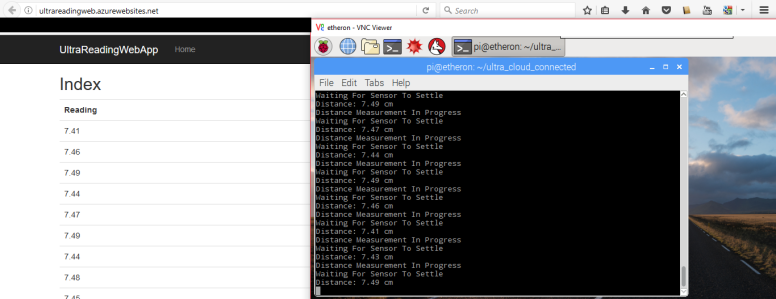
In that view, we’re just iterating on the Reading property and displaying them each in a table row.
Remember the two important SECRET strings you copied from Azure portal? now we’re gonna use them.
In the Common folder, add new class, name it “Constants“. have it changed to:
** DON’T FORGET TO REPLACE THE DATA WITH YOURS.
| using System; | |
| using System.Collections.Generic; | |
| using System.Linq; | |
| using System.Web; | |
| namespace UltraReadingWeb.Common | |
| { | |
| public static class Constants | |
| { | |
| public static readonly string DatabaseId = "SensorsReadings"; | |
| public static readonly string CollectionId = "UltraSonicCollection"; | |
| public static readonly string EndPoint = "YOUR_END_POINT_HERE"; | |
| public static readonly string AuthKey = "YOUR_PRIMARY_KEY_HERE"; | |
| } | |
| } |
One last two pieces of code to add is in Global.asax.cs file, in the Application_Start method.
| DocDBRepo<UltraReading>.Initialize(); |
and the other is in App_Start\RouteConfig.cs
Replace the following line of code:
| defaults: new { controller = "Home", action = "Index", id = UrlParameter.Optional } |
to:
| defaults: new { controller = "UltraReading", action = "Index", id = UrlParameter.Optional } |
Here we’re just routing incoming requests to UltraReading controller instead off Home controller.
And we’re done on the ASP Web App part. let’s publish it to Azure, making it public.
Right click on your project and select Publish
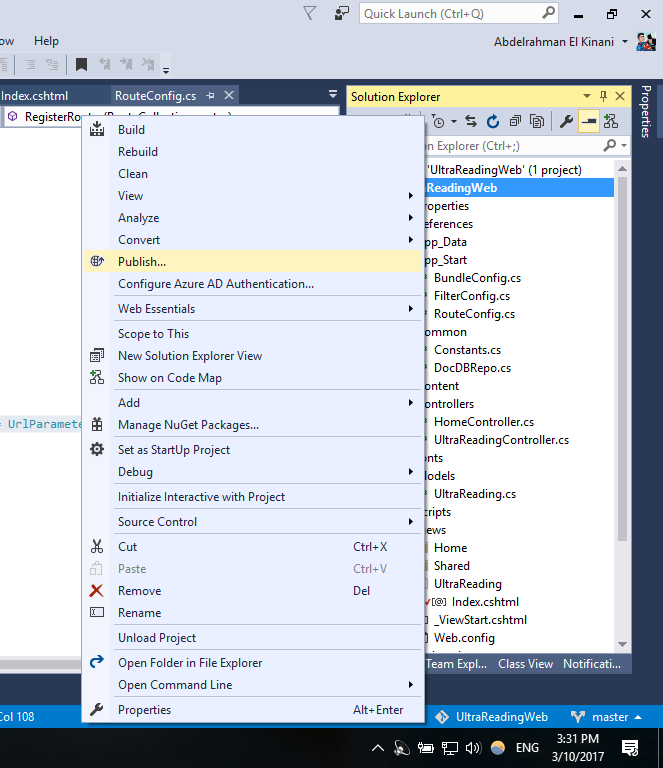
Once the new window is here, all is left to do is to click Publish button, and depending on your Internet speed; this web app will be available to access.
Now, Switching to your Raspberry Pi!
By reaching this stage, you’re expected to:
- Have your Raspberry Pi connected to the Internet.
- RPi is running the Raspbian OS/Debian based Linux.
- Your choice of sensors is already connected to the RPi.
In your RPi bash:
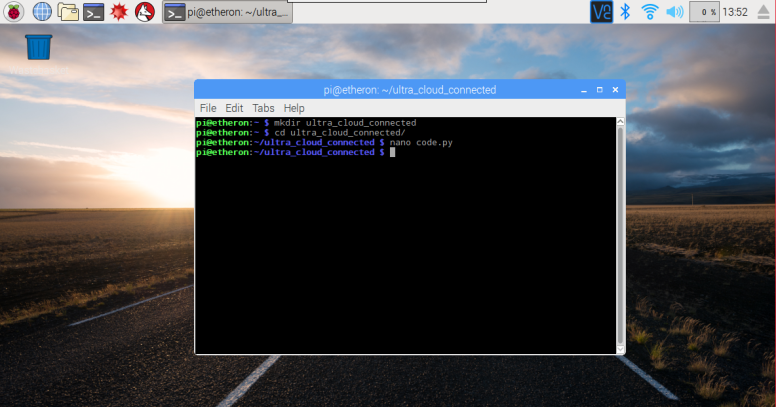
once you reach this command:
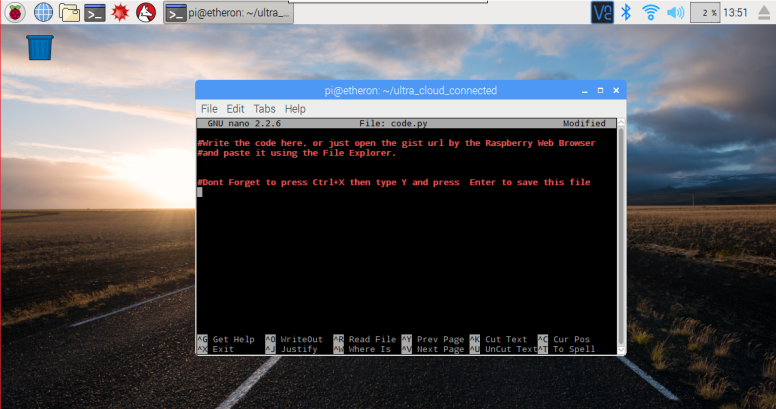
nano code.pyContinue with the following:
| import RPi.GPIO as GPIO | |
| import time | |
| import pydocumentdb.document_client as document_client | |
| masterKey = 'YOUR_PRIMARY_KEY' | |
| host = 'YOUR_END_POINT' | |
| client = document_client.DocumentClient(host, {'masterKey': masterKey}) | |
| while True: | |
| GPIO.setmode(GPIO.BCM) | |
| TRIG = 23 | |
| ECHO = 24 | |
| print "Distance Measurement In Progress" | |
| GPIO.setup(TRIG,GPIO.OUT) | |
| GPIO.setup(ECHO,GPIO.IN) | |
| GPIO.output(TRIG, False) | |
| print "Waiting For Sensor To Settle" | |
| time.sleep(2) | |
| GPIO.output(TRIG, True) | |
| time.sleep(0.00001) | |
| GPIO.output(TRIG, False) | |
| while GPIO.input(ECHO)==0: | |
| pulse_start = time.time() | |
| while GPIO.input(ECHO)==1: | |
| pulse_end = time.time() | |
| pulse_duration = pulse_end - pulse_start | |
| distance = pulse_duration * 17150 | |
| distance = round(distance, 2) | |
| print "Distance:",distance,"cm" | |
| GPIO.cleanup() | |
| document_definition = {'id': '', | |
| 'reading' : distance} | |
| created_document = client.UpsertDocument('dbs/SensorsReadings/colls/UltraSonicCollection',document_definition) | |
| time.sleep(2.0) |
Remember to replace:
- ‘YOUR_PRIMARY_KEY‘
- ‘YOUR_END_POINT‘
And also note that this code, is written for the HC-SR04 module.
One last thing worth mentioning, is the URI used with UpsertDocument, it follows the following scheme:
dbs/[database_name]/colls/[collection_name]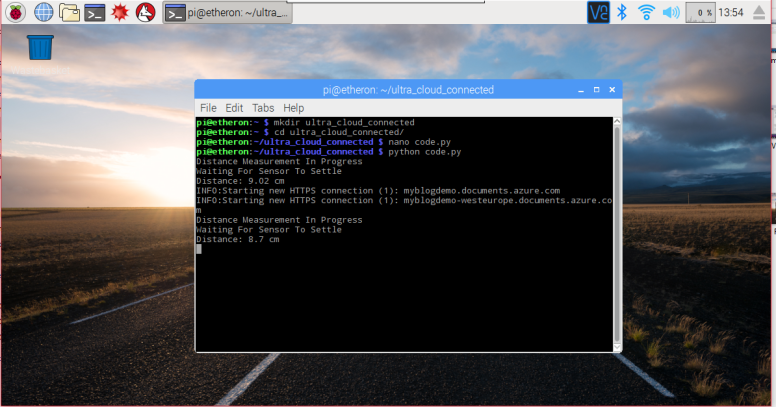
And that’s it~!
we’re done here 😀
Github repo: https://github.com/Kinani/UltraReadingWeb
Credits goes to this article, for the ASP web App part:
https://docs.microsoft.com/en-us/azure/documentdb/documentdb-dotnet-application
