Now you have been a Dreamspark student for a while, and you still didn’t use your free Azure subscription?! Not anymore now you have a reason to 🙂
And I quote from here:
Microsoft Azure for DreamSpark gets you started with the services you need to develop in the cloud at no cost:
- Azure App Service Web Apps is a part of a fully managed cloud offering that enables you to build and deploy web apps in seconds. Use ASP.NET, Java, PHP, Node.js or Python. Run popular web apps and CMS solutions. Set up continuous integration and deployment workflows with VSO, GitHub, TeamCity, Hudson or BitBucket – enabling you to automatically build, test and deploy your web app on each successful code check-in or integration tests.
- MySQL Database from ClearDB adds the power of MySQL to your Web Apps. With clearDB MySQL you can deploy more kinds of web apps and CMS solutions such as WordPress, Joomla, Acquia Drupal, phpBB, and more.
- Application Insights provides a 360° view across availability, performance and usage of your ASP.NET services and mobile applications for Windows Phone, iOS and Android platforms. Search and analyze your data to continuously improve your application, prioritize future investments and improve overall customer experience.
- Visual Studio Online is the fastest and easiest way yet to plan, build, and ship software across a variety of platforms. Get up and running in minutes on our cloud infrastructure without having to install or configure a single server.
Yeah pretty awesome!
So today we’re going to create our database then connect it to our C# code, Let’s dive in.
First we log in to Azure portal , then New -> Data + Storage
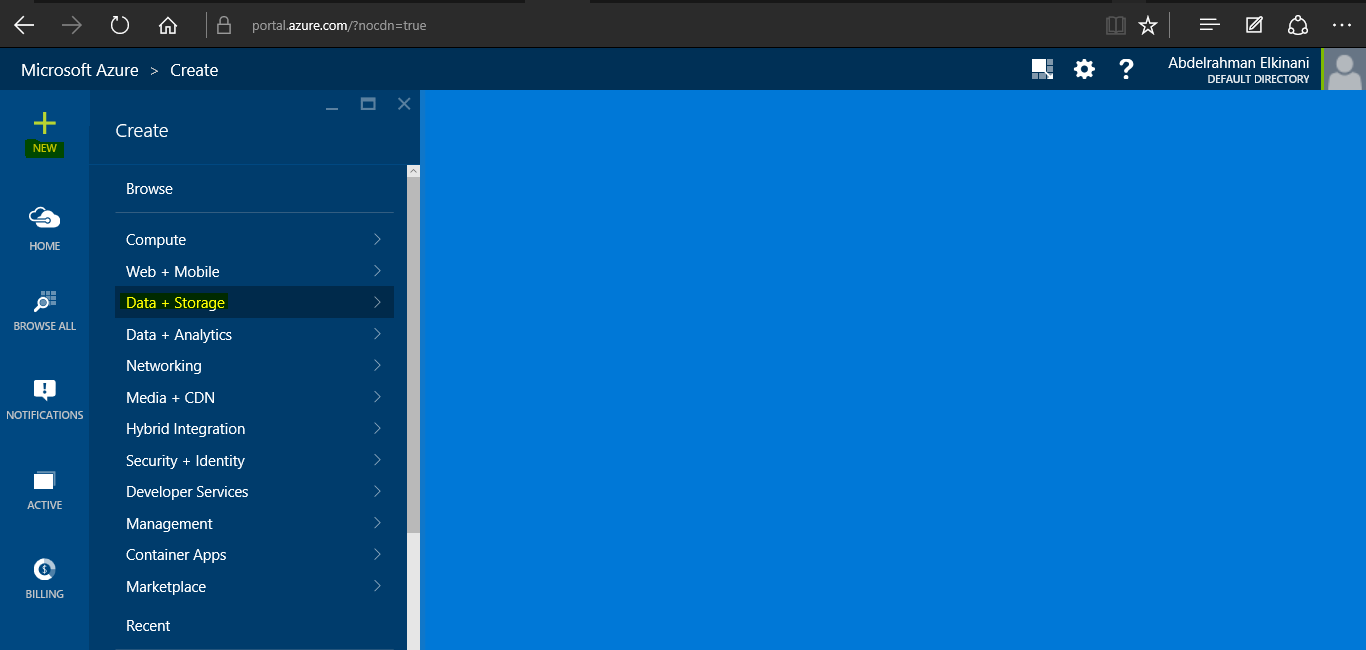
We chose MySQL Database

Then we type the database name, and make sure that Pricing Tier is set to Mercury ( as it’s the only free tier )
We chose the closet location for Servers according to your geological location, Accept the Legal Terms, Then we’re ready to create!
Note that Database username and password are set to you automatically.
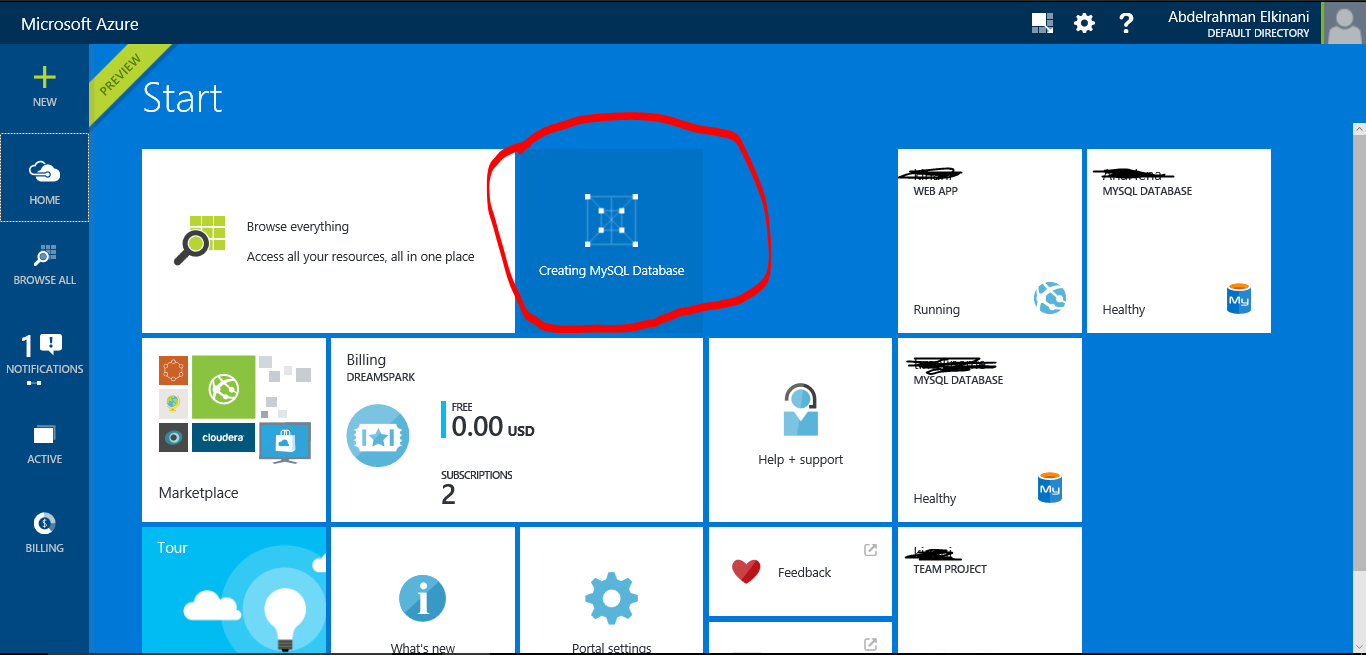
We wait the database to finish creating
To connect to any MySQL Database we need a ConnectionString that includes:
- Database name
- Host/server name
- User Id (username)
- Password
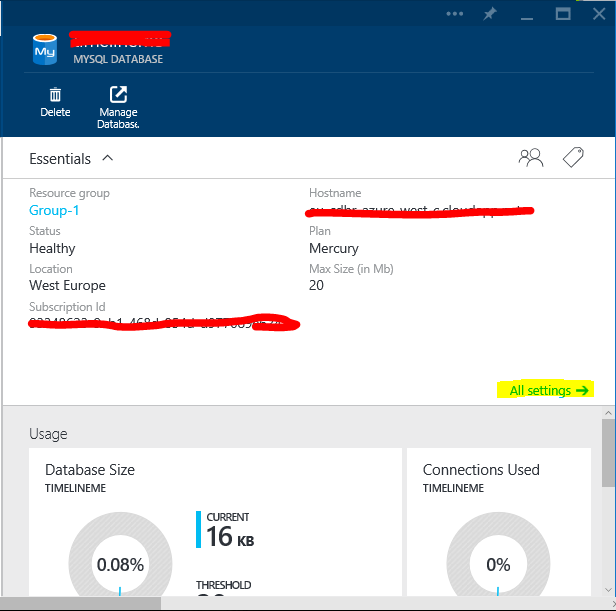
To retrieve the connection string we click on the MySQL database you just created -> All settings -> Properties :
We copy the Connection String
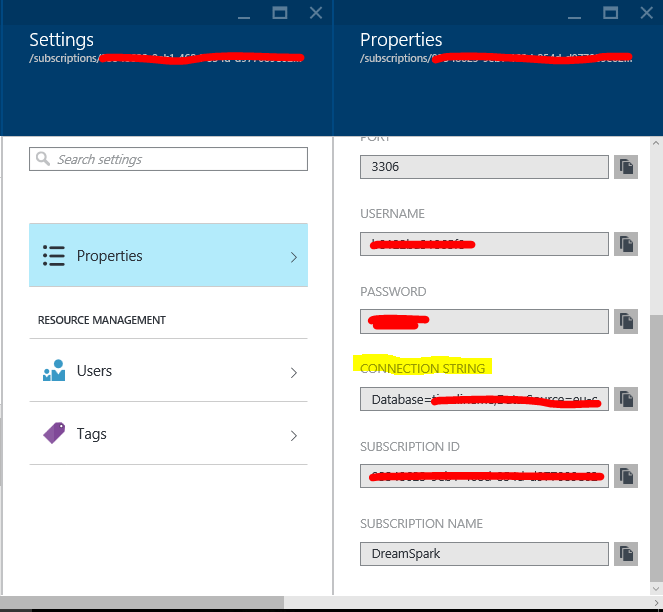
Keep it safe and secret away from bad guys.
Connection Time 🙂
Before making a connection you need to download the .NET Connector and reference it within your project.
To download it you have two options :
- Download MySQL Installer ( Preferred )
- Include a NuGet Package.
After whatever option you made, it’s time to reference MySQL to your C# project:

At Extensions We look for MySQL.Data and add it.
Then we need to add this line of code within the usings section
using MySql.Data.MySqlClient;
We’re ready to go! here’s my full console code:
 using MySql.Data.MySqlClient;
 using System;
 using System.Collections.Generic;
 using System.Linq;
 using System.Text;
 using System.Threading.Tasks;
 namespace ForBlogConsole
 {
   class Program
   {
     static void Main(string[] args)
     {
       string connectionString = "your connection string";
       MySqlConnection conn = new MySqlConnection(connectionString);
       try
       {
         conn.Open();
         Console.WriteLine("Connection Openned!, And MySQL server version is: {0}", conn.ServerVersion);
       }
       catch(Exception ex)
       {
         Console.WriteLine("Error: {0}", ex.ToString());
       }
     }
   }
 }
The result :

The next post of this series will be about designing your MySQL database and implementing the basic operations on it.
